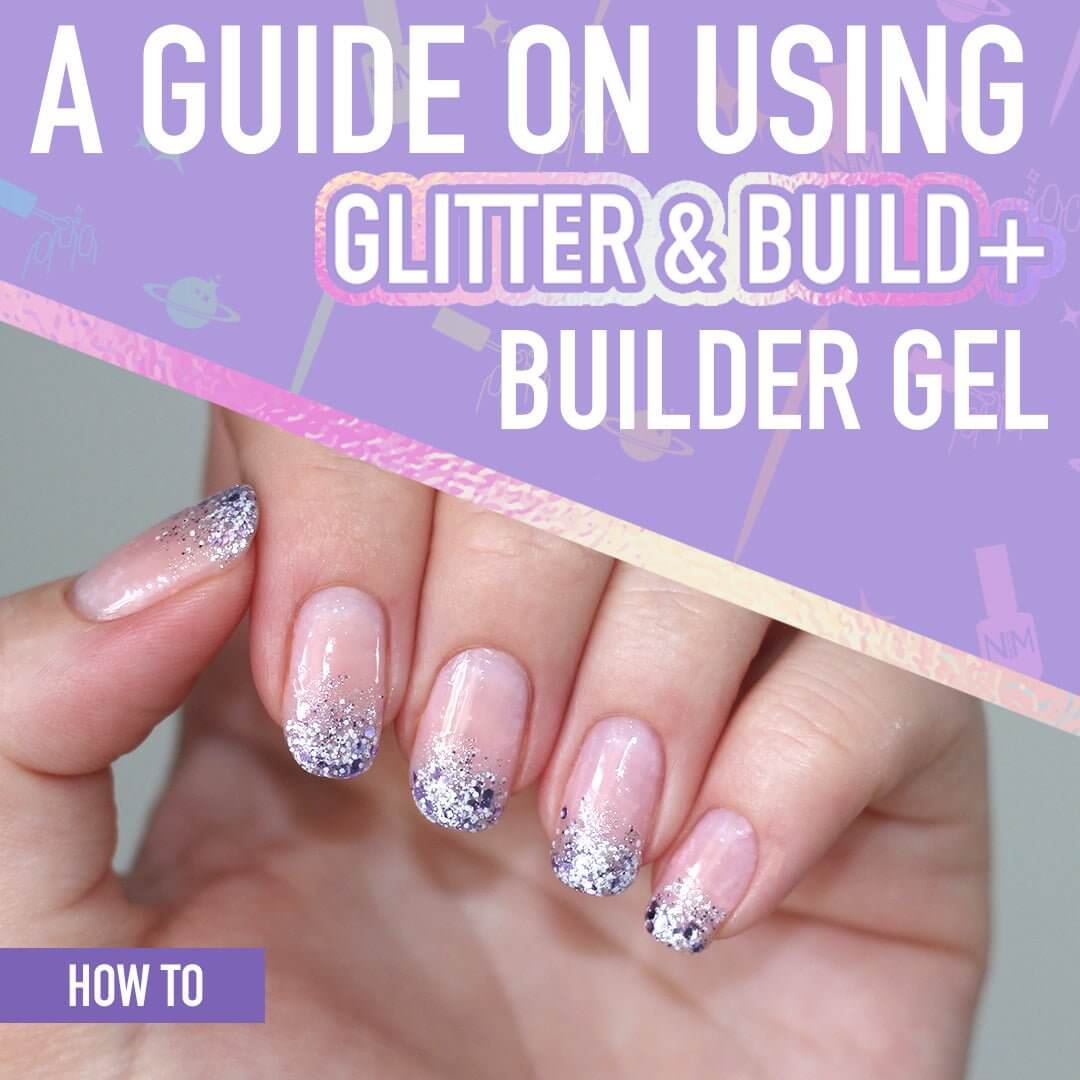
How to Use Loose Nail Art Glitter with Builder Gel: A Beginner's Guide
Nail art enthusiasts are always on the lookout for new ways to create stunning designs. One of the most versatile and eye-catching techniques is using loose nail art glitter, and we are going to share our tips on using loose glitter with builder gel. This method not only allows for endless creative possibilities but also provides a smooth, encapsulated finish that will last for weeks. If you're new to this, don't worry—this guide will walk you through the process step-by-step, using Nail Mate Build+ (builder gel) Gel and the LED PRO+ Nail Lamp.

What You'll Need:
- Nail Mate Build+ Gel (builder gel)
- LED PRO+ LED Lamp
- Loose Nail Art Glitter
- Nail prep tools (cuticle pusher, nail file, buffer)
- Nail Mate Base coat
- Super Gloss non-wipe Top coat
- Gel brush or applicator
- Lint-free wipes
- Nail Mate Safe Scrub Cleanser or Isopropyl alcohol
Step-by-Step Guide
1. Nail Preparation
Proper preparation is key to ensuring your nail art lasts. Follow these steps to get your nails ready for BUILD+ Strengthening gel (builder gel):
1. **Clean Your Nails:** Remove any existing polish and clean your nails with a lint-free wipe soaked in Nail Cleanser or isopropyl alcohol.
2. **Shape Your Nails:** Use a 180 or 240 nail file to shape your nails to your desired length and shape.
3. **Push Back Cuticles:** Gently push back your cuticles using a cuticle pusher.
4. **Buff the Surface:** Lightly buff the surface of your nails with a buffer to remove shine and create a rough texture for better BUILD+ gel adhesion.
5. **Clean Again:** Wipe your nails with Nail Cleanser or isopropyl alcohol to remove any dust and oils. And apply your nail primer.
2. Apply the Base Coat
Apply a thin layer of base coat to your nails. Cure under the Nail Mate PRO+ LED Lamp for 60 seconds. Use the 90s low heat mode if you need to, this reduces heat spikes.
3. Apply Builder Gel
1. **First Layer:** Apply a thin layer of Nail Mate Build+ Gel (builder gel) to the entire nail. Don’t worry about building thickness at this stage—this layer acts as a foundation.
2. **Cure:** Cure the gel under the PRO+ LED Lamp for 60 seconds.

4. Apply Loose Glitter
1. **Second Layer of Builder Gel:** Apply a slightly thicker layer of builder gel but do not build it up yet. Cure this in the light for 60 seconds.
2. **Add Glitter:** Using Clear BUILD+ gel on a palette mix with your choice of loose glitter, use a gel brush or silicone tool to pick up the loose glitter mix and place it onto the nail. Make sure its laying flat and cure into place once happy.
3. **Pat Down the Glitter:** Gently press down on any glitter with the brush or a silicone tool to ensure it lays flat. This step is crucial for achieving a smooth finish. Remove any pieces that aren't co-operating.
4. **Cure:** Once you’re happy with the glitter placement, cure under the PRO+ LED Lamp for 60 seconds.
5. Encapsulate with Builder Gel
1. **Build Up the Nail:** Apply another layer of clear Nail Mate Build+ Gel over the glitter to encapsulate it. This layer should be thick enough to smooth out the surface but not so thick that it looks bulky.
2. **Smooth the Surface:** Use the gel brush to smooth the surface of the gel. Flip your hand upside down for a few seconds to allow the BUILD+ gel to level itself, creating a smoother finish.
3. **Cure:** Cure under the PRO+ LED Lamp for 60 seconds. If you find any small bumps on the nail wipe off the tacky layer and give the nails a quick buff with a 180 grit file.

6. Finish with Top Coat
1. **Clean the Nails:** Wipe the nails with a lint-free wipe soaked in Nail Cleanser or isopropyl alcohol to remove any dust or sticky residue.
2. **Top Coat:** Apply a thin layer of Super gloss Gel top coat to seal in your design and give it a high-gloss finish.
3. **Final Cure:** Cure under the LED PRO+ LED Lamp for 60 seconds.
7. Final Touches
1. **Clean Again:** Once the top coat is cured, give your hands and nails a good clean with some warm soapy water and a scrub brush.
2. **Moisturise:** Apply cuticle oil to nourish your cuticles and moisturise the skin around your nails.
Tips for Beginners when applying glitter with builder gel
- Practice Patience: Working with glitter can sometimes feel messy and frustrating. Take your time to get the placement just right.
- Use Thin Layers: Applying gel in thin layers helps prevent bubbling and ensures a smooth finish. It also means there's no extra bulk.
- Experiment: Don’t be afraid to mix different glitters or try out new designs. Nail art is all about creativity!
By following these steps, you can create beautiful, glittery builder gel nails that are smooth and long-lasting. Whether you’re doing this in the salon, for a special occasion or just for fun, using loose nail art glitter with builder gel can elevate your nail game to a whole new level. Happy nail designing!